Showing posts with label how to. Show all posts

How to add a Blog Signature in Blogger


Hi! I'm sharing a tutorial today on how to add a signature in Blogger. This method will automatically be placed at the bottom of each post and will update if you change the image.  It's my preffered method because it's easy to set up and it will show up on your older posts. This code is set up so it will prevent a pin it over from showing on your signature!

The older method has you put code in Blogger's Post Template section. So that specific code will show up every time you create a new post.  The downside of this is you can't update ALL your older signatures at once and you have to go back to remove every single old one.

Remember to backup your layout before making changes. Do this by going to Template  > clicking on Backup/Restore button and  Download full template right there.


PLACING THE SIGNATURE IN THE TEMPLATE


Upload your blog signature and get the direct link of it then replace YOUR IMAGE URL with it.

  • Go to Template > Edit HTML and click in the box.
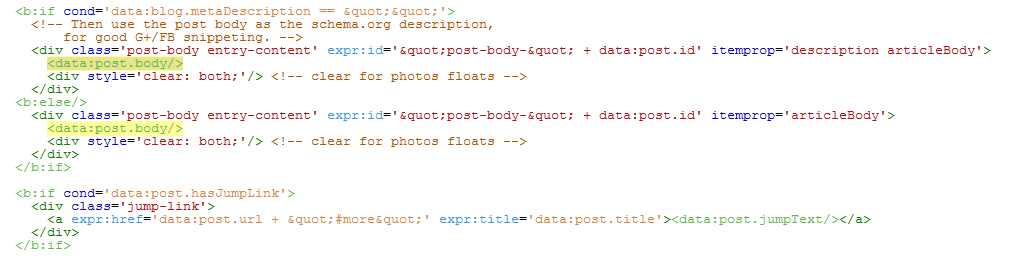
  • Press CTRL + F to search this:  <data:post.body/>
  • Hit enter twice and you will see the second & third lines highlighted. Place it underneath the second one at the top.


Copy this code:


THE CSS PART

  • Go to Template> Customize to open up the Template Designer.
  • Click on Advanced > Add CSS.


Copy and paste this code into the box and hit Save.


Change the width to the size of your own image. A max width is put there so it won't stretch on the page. The text align can be center, left or right.


UPDATING YOUR SIGNATURE


  • Go to Template > Edit HTML and click in the box.
  • Press CTRL + F to search this:

    <div class='signature'>
 Then replace the old image with your new signature's URL.


Hope this was easy to follow.  If you'll like to see more posts like this, I'm open for requests! Just leave suggestions in the comments.


How to fix Blogger Syntax Error (with a new template)

Hello! I'm just sharing a fix for a Blogger error when you're uploading a new template especially third party ones. I have tried expanding the gadgets, reverting to using the Simple Template or reverting to Classic Templates option. None of those solutions have worked in this situation.

This has happened to me several times with my international customers!  It has left me stumped because I can upload it just fine in my own accounts. I'm not sure why they get an error. I wonder if it has any relation to them using their first language in Blogger and the gadgets are worded differently? I honestly don't understand this error or why it happens. I just know how to fix it.


We were unable to save your template.
Your template could not be parsed as it is not well-formed. Please make sure all XML elements are closed properly. XML error message: (SyntaxError) : Unexpected token <


Most importantly, you need to backup your previous template. Go to Template and click on the Backup/Restore button in the top corner. Choose "Download Full Template".

Please keep in mind if you are added something extra in your template like IntenseDebate (commenting system), javascript etc. That by uploading a new template, you will be losing those codes.

THE FIX:

1) Backup your gadgets and graphics. Copy & paste everything in your gadgets to a Notepad file or a Blog Post draft.

2) Now go to the folder where your new template is stored. Find the XML file and right click on it to choose "Open With".... Notepad! 

3) Go to your blog, choose the Template tab and open Edit HTML. Paste the whole code in the box and do not press Save yet. Press CTRL + F and type in the box: PageList
 
You may need to scroll down and look for the highlighted code:


Change PageList1 to PageList2. Just change the number. Click save. There's your new template.

Every single time it has been the PageList gadget that has been causing this error. Hopefully this will help others!

Red to Teal Hair Without Bleaching


The red was still pretty bright and seemed impossible to go from red to green/teal without bleach.   All I could imagine was this muddy color but it came out mostly fine.

Be prepared that this method is super drying. I grabbed one of those protein deep conditioner treatment packets.  I also didn't dilute the baking soda that much, probably a super great idea for others to do that :P


1) Mix clarifying shampoo and baking soda into a paste.  Left it in and wrapped up my hair for 30 minutes. It actually took out most of the color.

2) Crushed up Vitamin C supplements and mixed it in with clarifying shampoo. Left it in for 40 minutes. Color still came out!

*Baking soda opens up the hair follicle and you'll need to reduce the pH/seal it with a Apple Cider Vinegar rinse.

3) Repeated another baking soda paste for about 15 minutes.

I mix apple cider vinegar and conditioner together. Let it sit for 5 minutes and rinse out. If you hate the smell like me, you can use shampoo and do a conditioning treatment afterwards.

I chose Ion Bright's Teal as a base color.  I ordered Punky's Alpine Green and it came to me in a few days. Quickest shipping ever for the impatient me. :3  It covered all the uneven, dark and blonde pieces!


It would come out much lighter and brighter with freshly bleached hair but it's still awesome and bright enough for me. It's crazy how much color was taken out using these fading methods. My next color will either be Special Effects Fishbowl or Punky's Atlantic Blue or Apple Green :D

You'll get much better results if you do this method and lightly bleach your hair! :)


How to Safely Bleach Your Hair Using Coconut Oil.


It is time for an ultimate guide on how to bleach your hair the safe way!  I have been using this method for awhile now. Feel free to ask me questions afterwards.


Feel free to pin!
1 \ 2 \ 3 \ 4\ 5 \ 6 \ 7 
 
I personally always do a bleach bath whether it's lightly stripping out color or going full on bleach. I mix clarifying shampoo into the bleach bowl and use coconut oil for extra protection. I don't use exact measurements since I've done this often, I just eye it and go. There are measurements on the box/instructions.  The bleach mixture should be creamy because if it's too watery, there's a good chance the job will come out uneven.

COCONUT OIL
It's recommended that you use organic kind but that will be over $10 generally. I have used a regular jar from an Indian market for $3 and it works just the same.

BLEACH
 I have used Prism Lites (blue powder), Clairol Basic White and Loreal Quick Blue. 

DEVELOPER
My favorite ones are Clairol and Ion Sensitive.  

DYES

You can visit my FAQ to click on my dye tags for pictures of each color!
These are all links to where I get the dyes from.
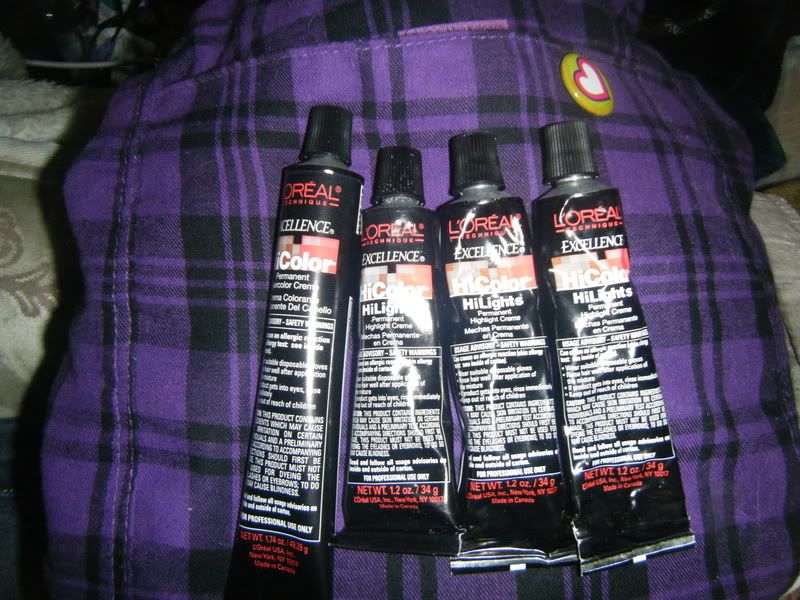
Loreal Hicolor Red/Magenta
, RAW Ruby Red, SFX Pimpin Purple, Manic Panic Ultra Violet,


**Do not leave bleach on longer than 60 minutes. **

# VOLUME?

I would only use 40 volume developer if you know your hair is extremely stubborn to lift and it's virgin hair. Otherwise use 30 or 20 volume. The coconut oil speeds up the lightening process so you may need to save your roots for last. (Especially if you use Loreal's Quick Blue bleach powder.)

IT'S IMPORTANT TO WAIT
You may need to do another bleach bath depending on your hair condition and what color you are going for.  PLEASE wait at least a week before attempting another bleach bath.

TREATMENT AFTER

Coconut oil protects your hair to a certain extent. It's still way better than bleaching by itself. You will still need to treat your hair nicely and condition it.  Use a protein packet treatment, argan oil treatment or Aussie 3 Minute Miracle for a good "quick fix".  

  Do you plan to dye your hair right after?
This is very important: You must shampoo your hair at least two times to remove the oil. Your hair will feel dry/gross but do not use conditioner.  Hair dye doesn't take well to conditioned hair so dry it and see if there's any oil left.  You can definitely mix veggie dyes & conditioner together.

Going blonde or need another bleach bath?
Conditioning treatments or a protein packet. You can also apply more coconut oil as a hair mask.

VEGGIE DYES
These are RAW, Special Effects, Punky, Manic Panic, Ion Brights (only) etc. 

Your hair shouldn't have any oil residue leftover. If you shampooed it out 100% then you need to airdry or blowdry your hair 100% bone dry.  If you are not sure: wait a day, shampoo again and dry it. These dyes will condition your hair.  I recommend leaving these dyes in for at least 3-5 hours.  Remember, patience! You can wrap it up for the night and wake up + wash to get your soft new hair :)

Ion Brights is a wonderful dye but it's difficult to apply by itself so mix in tons of conditioner! You can save money this way.


OTHER DYES
Loreal hicolor, Loreal hilift (for dark hair only), Ion Color, Clairol, etc. 

These dyes require that you mix volume developer with it. These are the dyes that usually say only leave it for 25 minutes or one hour.  Guess what? You can use coconut oil method for these dyes.  Apply the oil, wait at least one hour  then apply the dye mixture right on top of it. Process for the recommended time based on the dye you bought. Usually the time is either on the box or in the instructions.

Generally don't double process your hair. If you bleached your hair and your dye requires developer to be mixed in, be on the safe side and wait at least a week.

BLEACHING TO BLONDE

Use a blue toner for orange.
Use a purple toner for yellow.

People recommend Shimmer Lights shampoo to tone down brassiness.