Showing posts with label pattern. Show all posts

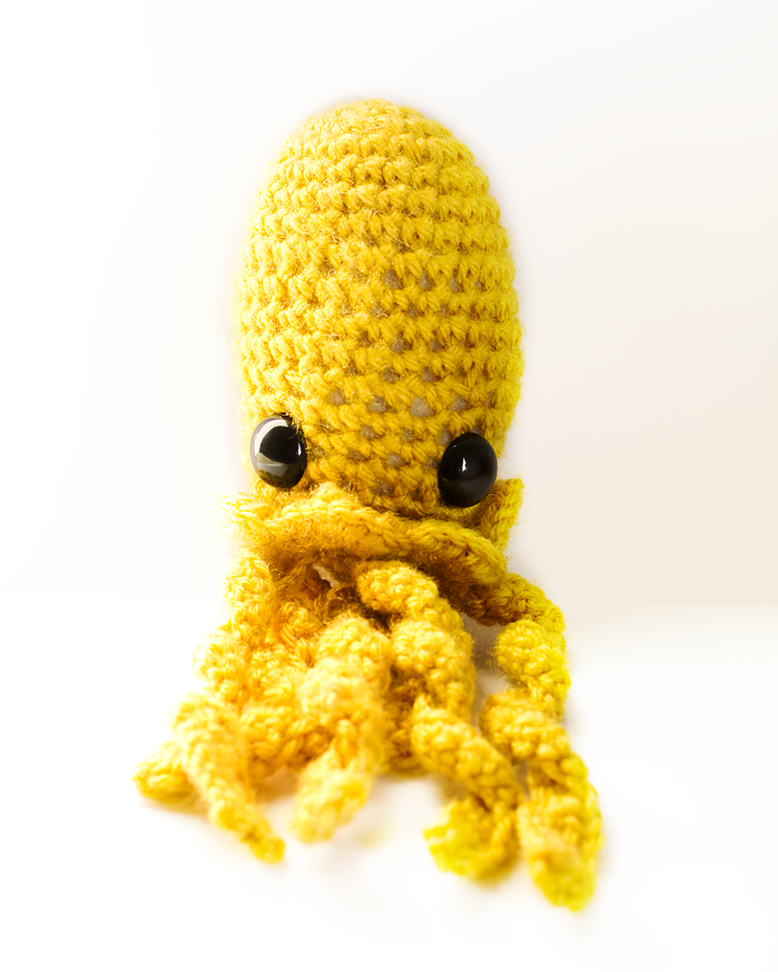
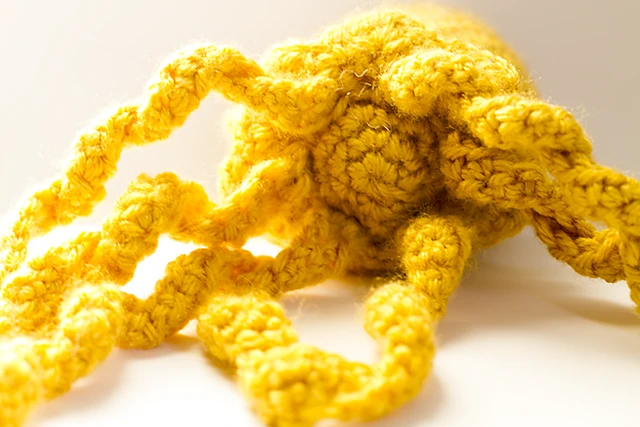
Jellyfish Amigurumi Pattern


It's now up on Ravelry!  


SUPPLIES
Worsted Weight yarn
G or D hook
Polyfill stuffing
15mm or 18mm safety eyes
Weaving needle

HEAD
Magic ring.
1.  6 single crochet into ring. (6)
2.  increase around (12)
3. "Single crochet, increase" around (18)
4. Single crochet 2 times, Increase" around (24)
5.-11 Single crochet around. (24)
12. "Single crochet 3 times, decrease" around. Single crochet in the last stitch.  (20)
13-17. Single crochet around. (20)
18. Single crochet once.
"Hdc 6 times in the next stitch, skip the next stitch,  Single crochet in the next 2 sts" around.
Single crochet in the last stitch. (50)
 Start stuffing and cut a short tail.


BOTTOM PIECE
Magic ring
1.  6 Single crochet into the ring.
2.  Increase around. (12)
3.  "Single crochet, increase" around. (18)
 

Hold up the piece FIRST underneath to line up with the hole.  I like it to be small because then it'll lay flat.  If it's too tiny, then do another increase round. Leave a long tail to attach around the very bottom of the 6 HDC's.

Then cut a long tail to attach it.


TENTACLES: Make 6 or 7
1. Chain 30.
2. Skip one, single crochet across.
3.  Chain 1, skip one, single crochet across.

I always attach one tentacle in the middle and then two on each side. I turn it around and attach another across the middle one to make sure it lines up. There was enough space on mine to add a 7th one :)


Watermelon Scarf Pattern

I'm super late with posting this! I made this back in May, took photos and wrote up the PDF for it but never took final shots of it. Can you tell I am super amused by this heat??   I thought I was smiling but apparently not haha. This is my crocheted watermelon scarf. I made one forever ago but I love this one so much more! It has two buttons on it so can either be worn like a scarf around the neck or have it loose around the shoulders :)


Or well, it can be watermelon cape. That works too!


I'm not sure if I would list this as a beginner project. I put together a PDF with pictures to help guide you :) You can download it here .


Materials
K, 6.50mm hook
Pink & Green Worsted Weight Yarn
Sewing Needle 1 or 2 Buttons & Matching Thread
Black felt & Matching Thread


Pattern

Row 1 in Pink)
Chain 3. "2 Dc, Ch 1, 3 Dc" in the last chain. Chain 3 and Turn.


Row 2)
2 Dc in the first st.
Chain 1. "3 Dc, Ch 1, 3 Dc" in the ch-1 space hole.
Chain 1, 2 Dc in the last st.

Chain 3, Turn.


Row 4) 2 Dc in the first st.
Chain 1. 3 Dc in each ch-1 space leading up to the top.
Chain 1. "3 Dc, Ch 1, 3 Dc” in the top point.

*Chain 1. 3 Dc in each ch-1 spaces* til the end.
Chain 3, Turn.


Repeat (Row 4) 11 (eleven) times. Start each row with a chain 3.


Switch to Green.

Row 1) Start with a Chain 3. 2 Dc in the first st.
Chain 1. 3 Dc in each ch-1 space leading up to the top.
Chain 1. "3 Dc, Ch 1, 3 Dc " in the top point.

*Chain 1. 3 Dc in each ch-1 spaces* til the end.
Chain 3, Turn.

Repeat (Row 1) 5 (five) more times.
Cut. Weave in all ends.


All you've left to do is cut out small ovals and sew your seeds onto your scarf!


Sew a button or two on the top section of the green.


Crochet Elephant Amigurumi Pattern


Here it is! One of my favorite animals... This tiny crochet elephant has been tested and the pattern is ready to go!  It's in PDF form with a bunch of pictures for assembly and additional page for just printing :)

$2


Materials:
·        C or D crochet hook
·        Worsted weight yarn
·        9mm safety eyes
·        Polyfil stuffing
·        Optional: Weaving yarn needle & pins (to hold ears in place)
Stitches:
·        Single crochet
·        Increase (two single crochet stitches in one)
Decrease (skip a stitch or single crochet 2 stitches together)


I will send you the PDF via email within 24 hours. If you make this, please share the pictures with me! I'll love to see :D

Crochet Pattern: Original Pokeball Hat


I made this hat originally for myself and I decided to share the pattern on my blog. There have been several comments about this hat coming out too small. Just for reference, my head circumference is 22". 

Another version is available here if you need a larger size.

P.S. Join by slip stitch or keep going around whatever your preference is.

I used Caron yarn.

I hook
with red yarn
Chain 3. 6 half double crochet into the ring.
Chain 2. 2 hdc (increase) in each stitch.
Chain 2. 1 hdc in next st, 2 hdc in the next.
Ch 2. 1 hdc in next 2 sts, 2 hdc in the next.
Ch 2. 1 hdc in the next 3 sts, 2 hdc in the next.
Ch 2. 1 hdc in the next 4 sts, 2 hdc in the next.
Ch 2. 1 hdc in the next 5 sts, 2 hdc in the next.
Ch 2. 1 hdc in the next 6 sts, 2 hdc in the next.
Ch 2. 1 hdc in the next 7 sts, 2 hdc in the next.
Ch 2. hdc across.
Ch 2. hdc across.
Ch 2. hdc across.
Ch 2. hdc across.


Black:
Ch 2. hdc across.
Ch 2. hdc across 7 times, hdc decrease in the next 2 stitches.
Ch 2. hdc across.
Ch 2. hdc across 7 times, hdc decrease in the next 2 stitches.
Ch 2. hdc across 5 times, hdc decrease in the next 2 stitches.

White:
Ch 2. hdc across


Circle piece:
H or I hook
Start with white yarn:

Ch 3.  hdc 6 times into the first chain to form a ring.
Ch 2. 2 hdc in each st around.
Ch 2. 2hdc in the next st, 1 hdc in the next st around.

Black as the border around the circle:
Ch 2. 2hdc in the next 2 sts, 1 hdc in the next st around.

Sew this piece on the center