
12.09.2013
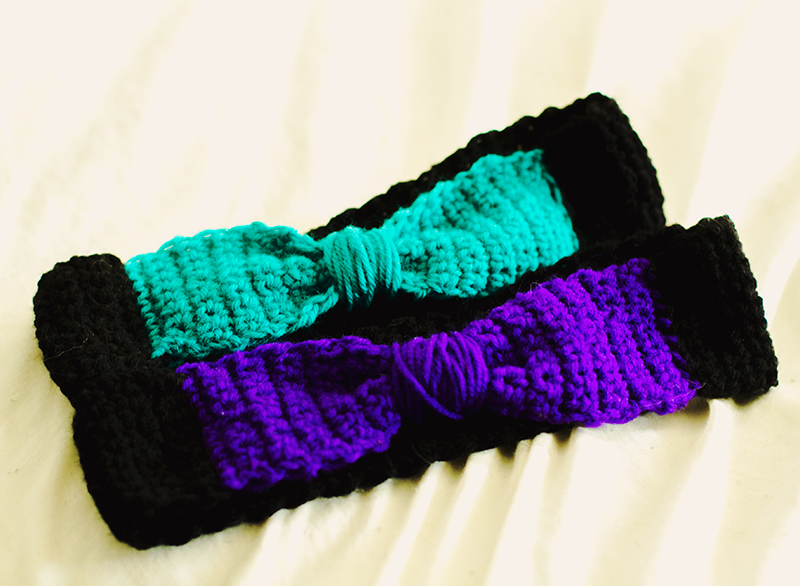
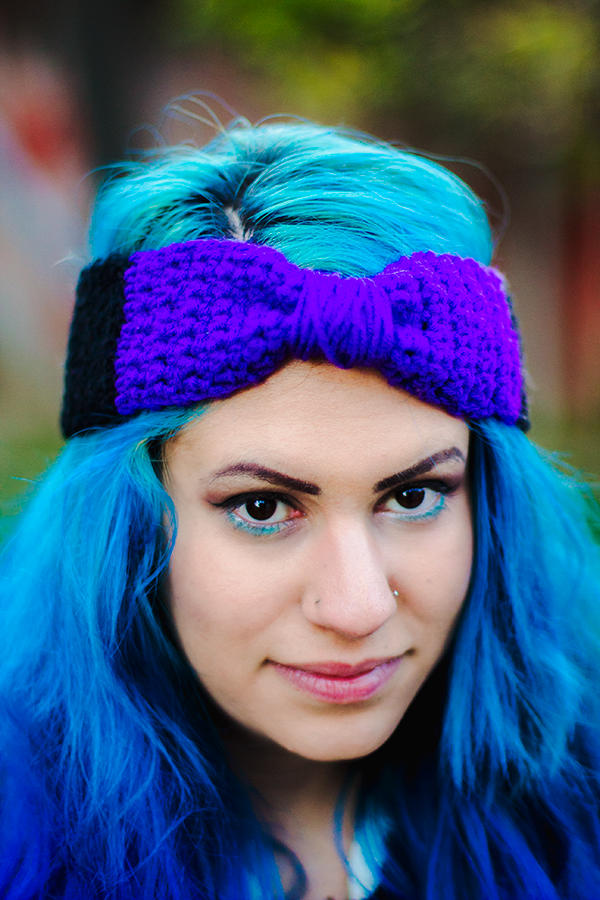
Headbands

I got an order for two headbands! I used Red Heart for the black and purple. The teal is Wool of the Andes Yarn from KnitPicks! I started with 10 chains for these and did it a bit differently just to secure it into place :) Surprisingly how I don't have much teal yarn.


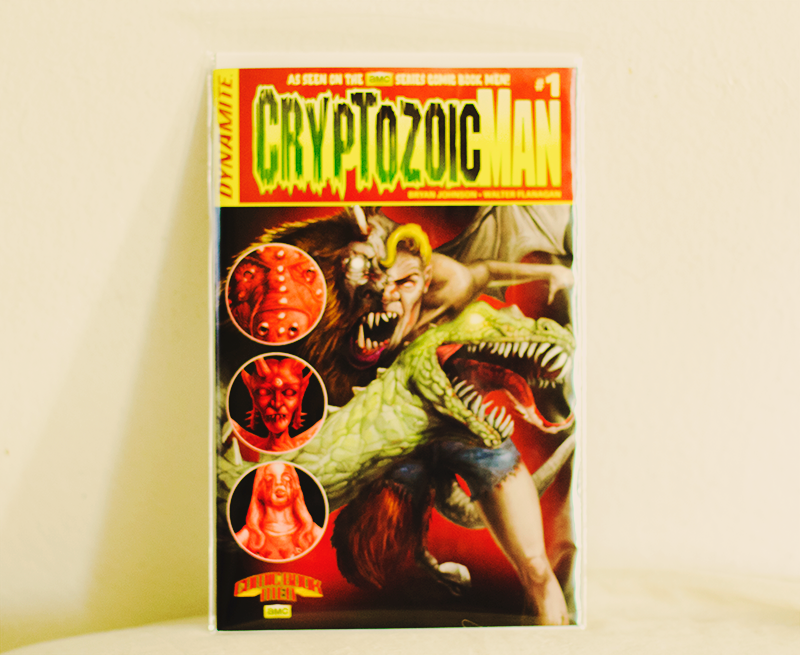
I love Tell 'Em Steve Dave and I've been listening since about two years ago. So excited to get my hands on Cryptozoic Man ever since I have heard about it! I love the artwork. Can't wait til I read more.


The Flower Hexagon Bag crochet pattern is now available for download! It's a great project to use up leftover yarn. You need approximately 3 yds of main color, .5 yds of contrasting color, and 5 yds of second contrasting color per hexagon.
The pattern includes written instructions, chart, diagrams, and photos. PDF has 5 pages.

Download PDF
Materials & Tools:
|
 |
Download PDF
Materials & Tools:
♥ Worsted weight yarn
♥ E/3.5mm crochet hook
♥ E/3.5mm crochet hook
Size:
Hexagons are about 3" (7.6cm) across between the points and each straight side is about 1.5" (3.8cm). The bag is 10" (25cm) wide and 9" (22.8cm) tall, excluding the straps. Results will vary depending on your tension and your yarn & hook choice.
I also made a Pinterest board for some color inspiration. Check it out for some ideas!
I've been working on pink & yellow ones:


I've been working on pink & yellow ones:
If you make this bag, don't forget to share it on Ravelry or post it in the comments so we can all see! :)
10.09.2013
Jellyfish Amigurumi Pattern
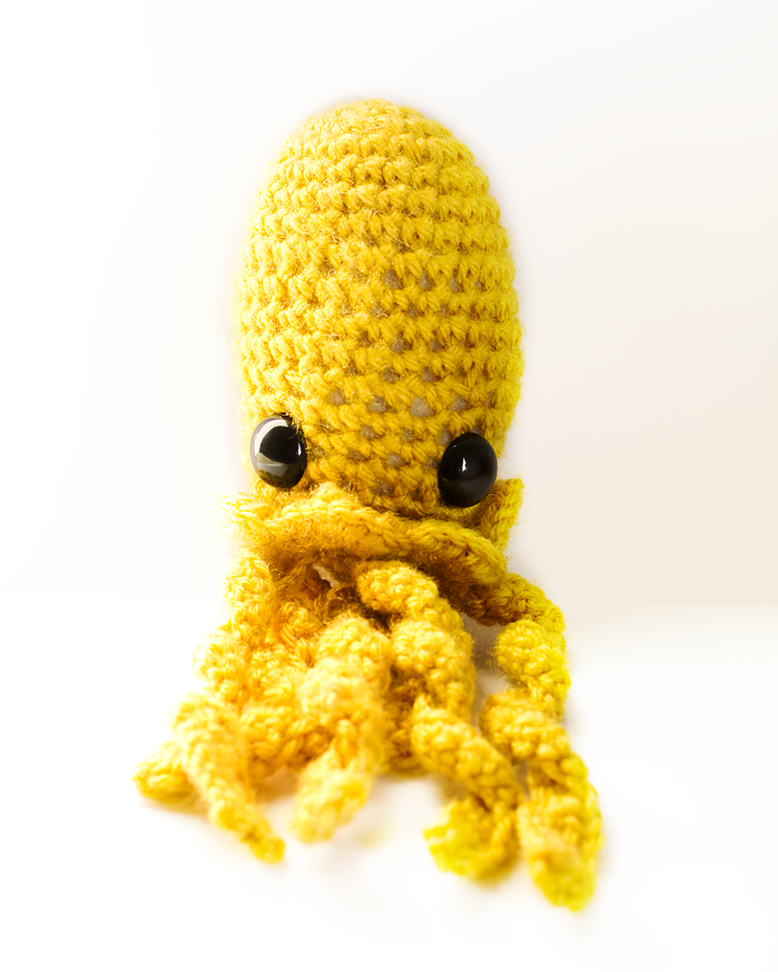

It's now up on Ravelry! Read more for the pattern :)
SUPPLIES
Worsted Weight yarn
G or D hook
Polyfill stuffing
15mm or 18mm safety eyes
Weaving needle
HEAD
Magic ring.
1. 6 single crochet into ring. (6)
2. increase around (12)
3. "Single crochet, increase" around (18)
4. Single crochet 2 times, Increase" around (24)
5.-11 Single crochet around. (24)
12. "Single crochet 3 times, decrease" around. Single crochet in the last stitch. (20)
13-17. Single crochet around. (20)
18. Single crochet once.
"Hdc 6 times in the next stitch, skip the next stitch, Single crochet in the next 2 sts" around.
Single crochet in the last stitch. (50)
Start stuffing and cut a short tail.
BOTTOM PIECE
Magic ring
1. 6 Single crochet into the ring.
2. Increase around. (12)
3. "Single crochet, increase" around. (18)
Hold up the piece FIRST underneath to line up with the hole. I like it to be small because then it'll lay flat. If it's too tiny, then do another increase round. Leave a long tail to attach around the very bottom of the 6 HDC's.
Then cut a long tail to attach it.
TENTACLES: Make 6 or 7
1. Chain 30.
2. Skip one, single crochet across.
3. Chain 1, skip one, single crochet across.
I always attach one tentacle in the middle and then two on each side. I turn it around and attach another across the middle one to make sure it lines up. There was enough space on mine to add a 7th one :)


7.11.2013
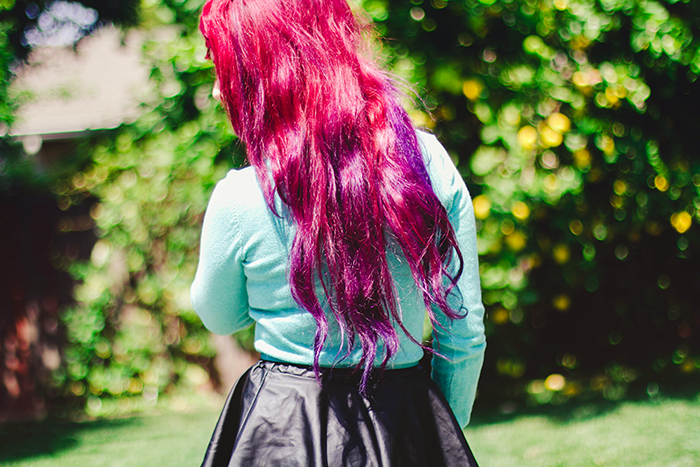
Red to Teal Hair Without Bleaching

The red was still pretty bright and seemed impossible to go from red to green/teal without bleach. All I could imagine was this muddy color but it came out mostly fine.
Be prepared that this method is super drying. I grabbed one of those protein deep conditioner treatment packets. I also didn't dilute the baking soda that much, probably a super great idea for others to do that :P
1) Mix clarifying shampoo and baking soda into a paste. Left it in and wrapped up my hair for 30 minutes. It actually took out most of the color.
2) Crushed up Vitamin C supplements and mixed it in with clarifying shampoo. Left it in for 40 minutes. Color still came out!
*Baking soda opens up the hair follicle and you'll need to reduce the pH/seal it with a Apple Cider Vinegar rinse.
3) Repeated another baking soda paste for about 15 minutes.
I mix apple cider vinegar and conditioner together. Let it sit for 5 minutes and rinse out. If you hate the smell like me, you can use shampoo and do a conditioning treatment afterwards.
I chose Ion Bright's Teal as a base color. I ordered Punky's Alpine Green


It would come out much lighter and brighter with freshly bleached hair but it's still awesome and bright enough for me. It's crazy how much color was taken out using these fading methods. My next color will either be Special Effects Fishbowl or Punky's Atlantic Blue or Apple Green :D
You'll get much better results if you do this method and lightly bleach your hair! :)
7.01.2013
Watermelon Scarf Pattern

I'm super late with posting this! I made this back in May, took photos and wrote up the PDF for it but never took final shots of it. Can you tell I am super amused by this heat?? I thought I was smiling but apparently not haha. This is my crocheted watermelon scarf. I made one forever ago but I love this one so much more! It has two buttons on it so can either be worn like a scarf around the neck or have it loose around the shoulders :)


Or well, it can be watermelon cape. That works too!


 I'm not sure if I would list this as a beginner project. I put together a PDF with pictures to help guide you :) You can download it here .
Materials
K, 6.50mm hook
Pink & Green Worsted Weight Yarn
Sewing Needle 1 or 2 Buttons & Matching Thread
Black felt & Matching Thread
Pattern
Row 1 in Pink)
Chain 3. "2 Dc, Ch 1, 3 Dc" in the last chain. Chain 3 and Turn.
Row 2)
2 Dc in the first st.
Chain 1. "3 Dc, Ch 1, 3 Dc" in the ch-1 space hole.
Chain 1, 2 Dc in the last st.
Chain 3, Turn.
Row 4) 2 Dc in the first st.
Chain 1. 3 Dc in each ch-1 space leading up to the top.
Chain 1. "3 Dc, Ch 1, 3 Dc” in the top point.
*Chain 1. 3 Dc in each ch-1 spaces* til the end.
Chain 3, Turn.
Repeat (Row 4) 11 (eleven) times. Start each row with a chain 3.
Switch to Green.
Row 1) Start with a Chain 3. 2 Dc in the first st.
Chain 1. 3 Dc in each ch-1 space leading up to the top.
Chain 1. "3 Dc, Ch 1, 3 Dc " in the top point.
*Chain 1. 3 Dc in each ch-1 spaces* til the end.
Chain 3, Turn.
Repeat (Row 1) 5 (five) more times.
Cut. Weave in all ends.

All you've left to do is cut out small ovals and sew your seeds onto your scarf!

Sew a button or two on the top section of the green.
Or well, it can be watermelon cape. That works too!
I'm not sure if I would list this as a beginner project. I put together a PDF with pictures to help guide you :) You can download it here .Materials
K, 6.50mm hook
Pink & Green Worsted Weight Yarn
Sewing Needle 1 or 2 Buttons & Matching Thread
Black felt & Matching Thread
Pattern
Row 1 in Pink)
Chain 3. "2 Dc, Ch 1, 3 Dc" in the last chain. Chain 3 and Turn.
Row 2)
2 Dc in the first st.
Chain 1. "3 Dc, Ch 1, 3 Dc" in the ch-1 space hole.
Chain 1, 2 Dc in the last st.
Chain 3, Turn.
Row 4) 2 Dc in the first st.
Chain 1. 3 Dc in each ch-1 space leading up to the top.
Chain 1. "3 Dc, Ch 1, 3 Dc” in the top point.
*Chain 1. 3 Dc in each ch-1 spaces* til the end.
Chain 3, Turn.
Repeat (Row 4) 11 (eleven) times. Start each row with a chain 3.
Switch to Green.
Row 1) Start with a Chain 3. 2 Dc in the first st.
Chain 1. 3 Dc in each ch-1 space leading up to the top.
Chain 1. "3 Dc, Ch 1, 3 Dc " in the top point.
*Chain 1. 3 Dc in each ch-1 spaces* til the end.
Chain 3, Turn.
Repeat (Row 1) 5 (five) more times.
Cut. Weave in all ends.
All you've left to do is cut out small ovals and sew your seeds onto your scarf!
Sew a button or two on the top section of the green.
6.02.2013
How to Design Your Own Amigurumi

This is a basic step by step guide on how to create your own amigurumi. I have plans to make amigurumi design progress videos soon since some people learn better from those.
1. Crochet Basics
Practice getting your tension/gauge just right. Use different yarn weight and hook sizes to find what is best for you. You need to make sure your stitches are even and tight enough that stuffing isn't showing through.
Being familiar with your gauge can also help you decide what yarn weight and hook size to use to create an amigurumi of a certain size.

Practice single crochet, working in front loops only, working in the back loops only, increasing, decreasing, working in rows, working in spiral rounds, and working in joined rounds.
2. Basic Shapes

Look up how to create basic shapes. Following an exact pattern isn't necessary, you just need to understand the construction.
For example to make a sphere or circle: You need to increase evenly around until it's about as wide as you want it to be. Then you crochet even (just single crochet rounds, no more increases) until it's a few rounds from the height you want it, and then you decrease evenly around.
3. Sketch Your Ideas

Now it's time to get your ideas on paper. Your sketch will need to be simplified to basic shapes that you can crochet. Keep note of how big you want it to be, colors, materials/techniques you'd like to use, and such. I recommend drawing it out on another piece of paper in the size you'd like to make it so you can use it as a reference as you crochet along.
4. Advanced Techniques

After you figure out what you want to make, you might want to add in a special feature that may require using a more fancy stitch. Look up more complex stitches and advanced techniques such as tall stitches (double crochet, treble crochet), decorative stitches (popcorn stitch, surface crochet), color changes, and embroidery.
5. Crocheting Your Prototype

Start crocheting up your idea. This is just a test so it's okay if it's not 100% perfect or you're not exactly sure what you want. You can redo it later and make modifications to your pattern. Experiment, do deviate from the norm, and you'll be designing your own amigurumi in no time.
Made in June 2013.
1. Crochet Basics
Practice getting your tension/gauge just right. Use different yarn weight and hook sizes to find what is best for you. You need to make sure your stitches are even and tight enough that stuffing isn't showing through.
Being familiar with your gauge can also help you decide what yarn weight and hook size to use to create an amigurumi of a certain size.
Practice single crochet, working in front loops only, working in the back loops only, increasing, decreasing, working in rows, working in spiral rounds, and working in joined rounds.
2. Basic Shapes
Look up how to create basic shapes. Following an exact pattern isn't necessary, you just need to understand the construction.
For example to make a sphere or circle: You need to increase evenly around until it's about as wide as you want it to be. Then you crochet even (just single crochet rounds, no more increases) until it's a few rounds from the height you want it, and then you decrease evenly around.
3. Sketch Your Ideas
Now it's time to get your ideas on paper. Your sketch will need to be simplified to basic shapes that you can crochet. Keep note of how big you want it to be, colors, materials/techniques you'd like to use, and such. I recommend drawing it out on another piece of paper in the size you'd like to make it so you can use it as a reference as you crochet along.
4. Advanced Techniques
After you figure out what you want to make, you might want to add in a special feature that may require using a more fancy stitch. Look up more complex stitches and advanced techniques such as tall stitches (double crochet, treble crochet), decorative stitches (popcorn stitch, surface crochet), color changes, and embroidery.
5. Crocheting Your Prototype
Start crocheting up your idea. This is just a test so it's okay if it's not 100% perfect or you're not exactly sure what you want. You can redo it later and make modifications to your pattern. Experiment, do deviate from the norm, and you'll be designing your own amigurumi in no time.
Made in June 2013.
5.15.2013
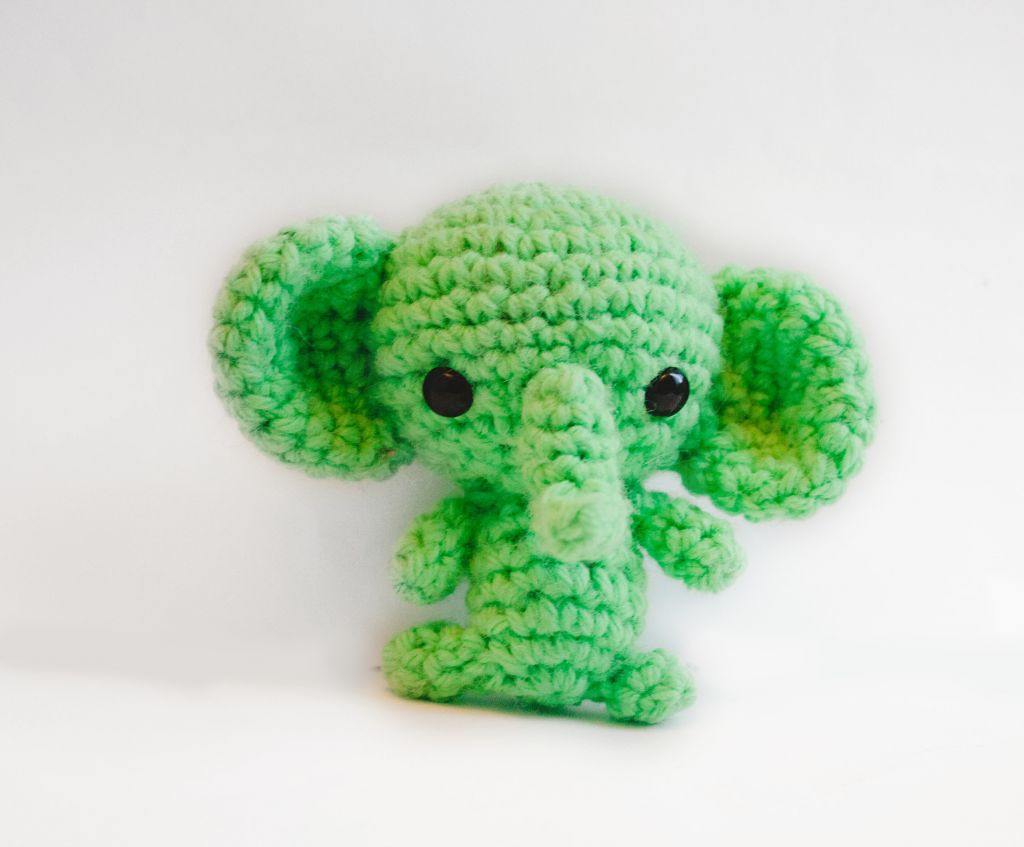
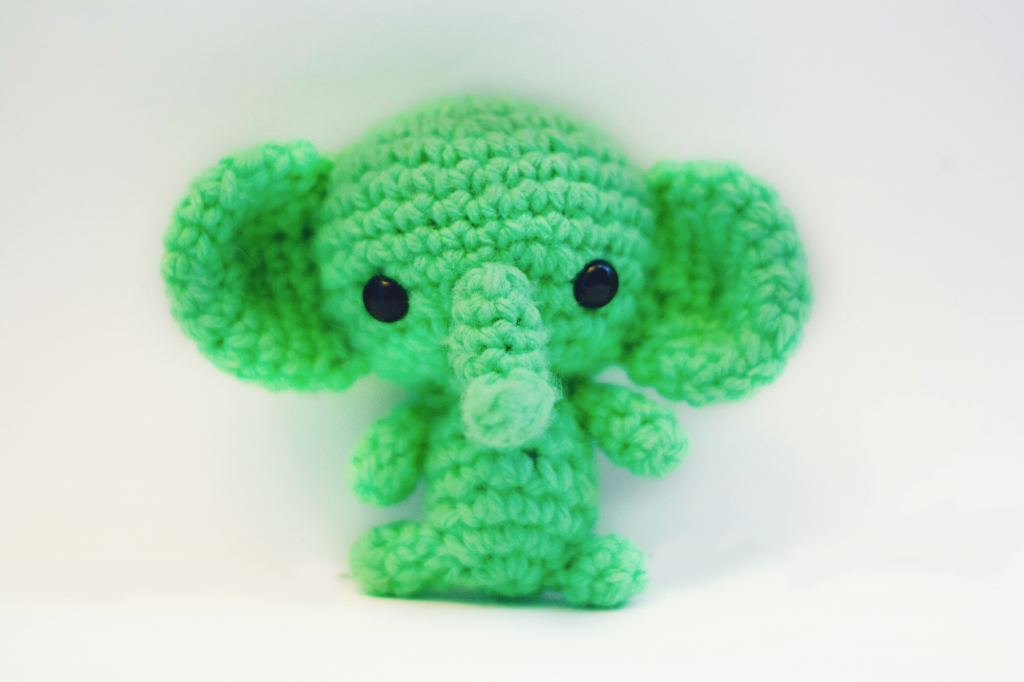
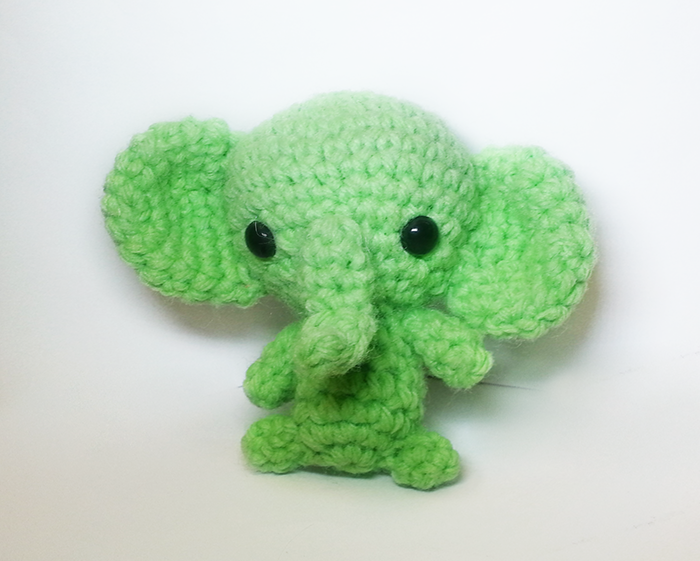
Crochet Elephant Amigurumi Pattern


Here it is! One of my favorite animals... This tiny crochet elephant has been tested and the pattern is ready to go! It's in PDF form with a bunch of pictures for assembly and additional page for just printing :)
Materials:
· C or D crochet hook
· Worsted weight yarn
· 9mm safety eyes
· Polyfil stuffing
· Optional: Weaving yarn needle & pins (to hold ears in place)
Stitches:
· Single crochet
· Increase (two single crochet stitches in one)
Decrease (skip a stitch or single crochet 2 stitches together)
I will send you the PDF via email within 24 hours. If you make this, please share the pictures with me! I'll love to see :D
4.25.2013
Style: Ombre Hair & Fake Leather Skirt

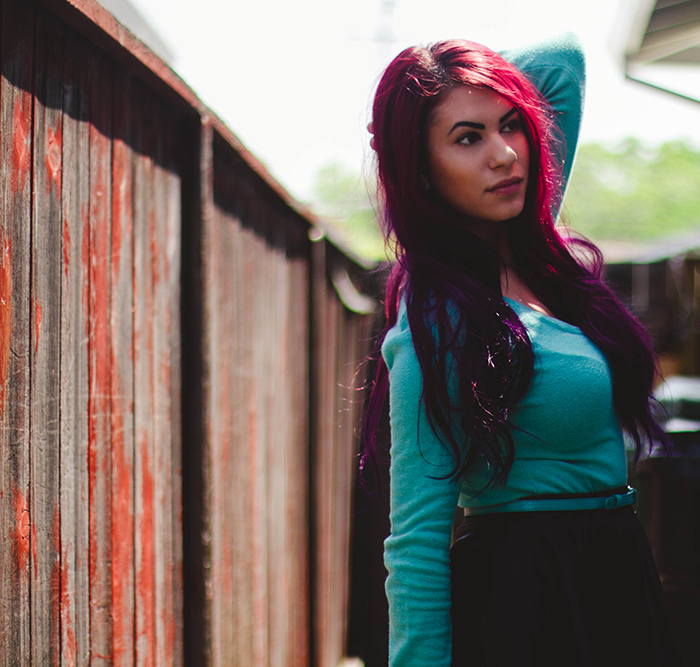
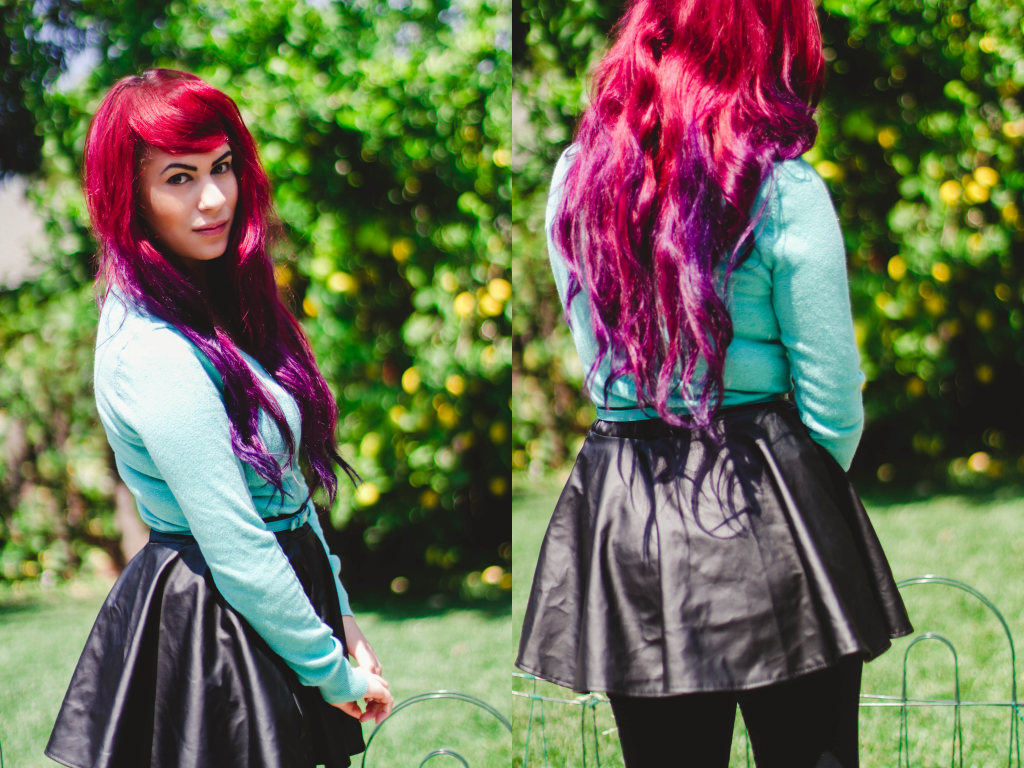
I have wanted a skirt like this for months but only at the right price. I thought I could probably find one for under ten bucks.... AND IT HAPPENED!! Now I just need a fake leather jacket. Busty ladies can wear those, right? That's what is stopping me from getting one.
Happy Thursday ♥

You will need white paper and natural light preferably near a window. :)
I placed paper down on my bed and stacked a couple of sheets against the wall then put the amigurumi in place. I took these photos around noon when the sun hits my window. I am using a 50mm lens at low f-stop and low ISO since it was bright. Bump up the ISO depending on your lighting condition.
If you have a continuous mode, use it!
Settings: f/2, 1/80, ISO 100
Editing

1) Crop out any distracting edges. If you have any lines you can select the brush tool & hold down CTRL to sample a color to paint over. That doesn't need to be perfect since we'll be brightening up the background next.

2) Merge down. Duplicate your layer. Go to Image> Adjustments> Brightness/Contrast and bump up the Brightness 50+. There we go! If your amigurumi is too bright, select a layer mask and use a black brush to paint it back.

3) If you feel that your amigurumi is too dark now, you can select a white brush and adjust the brush opacity settings to around 50%. Paint over your amigurumi to brighten it up.
OPTIONAL: Sharpening your image.

1) Go to Filter> Sharpen> Unsharp Mask and find the settings to fit your image.

Now it's complete! I save the high resolutions then afterwards resize at 700px as png's for posting on the web.
Before & After Comparison:

How to remove those random fuzzies or hair for close-ups:
1) Duplicate your layer. Select the healing brush tool at a small size. Select a nearby area by holding down CTRL and clicking.
2) Paint over it! Usually, this works. Sometimes you'll need to use the clone stamp tool.


That's it!
You don't need a super expensive camera to do this. ♥ Just white space and good lighting.
Settings: f/5, 1/40, ISO 400
Settings: f/1.8, 1/200, ISO 400

Settings: f/2.6, 1/68, ISO 80
Happy Wednesday
Subscribe to:
Posts (Atom)


Social Icons