
4.25.2013
Style: Ombre Hair & Fake Leather Skirt
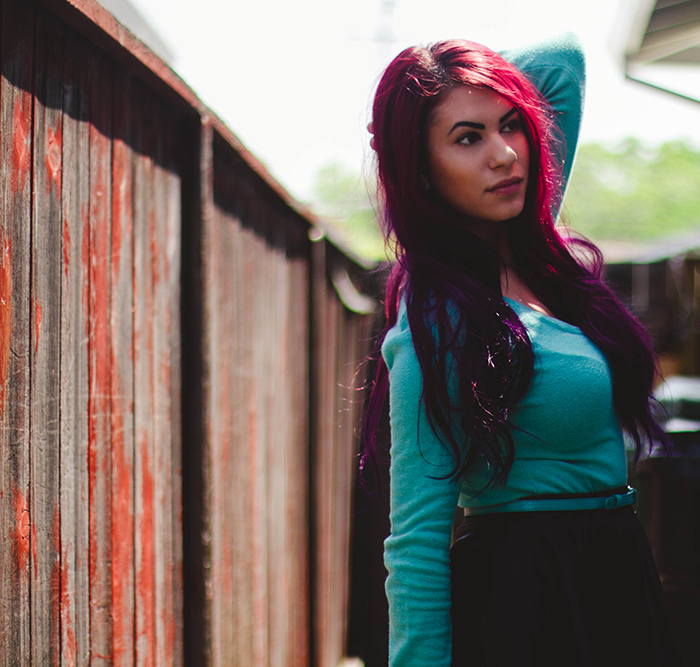
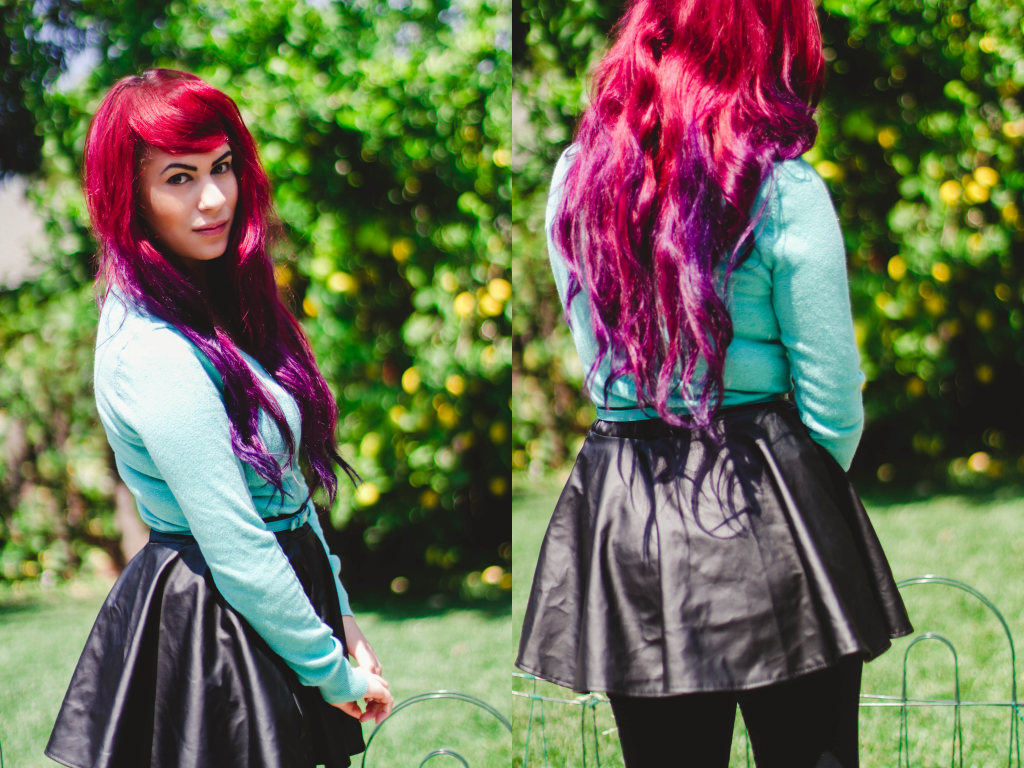
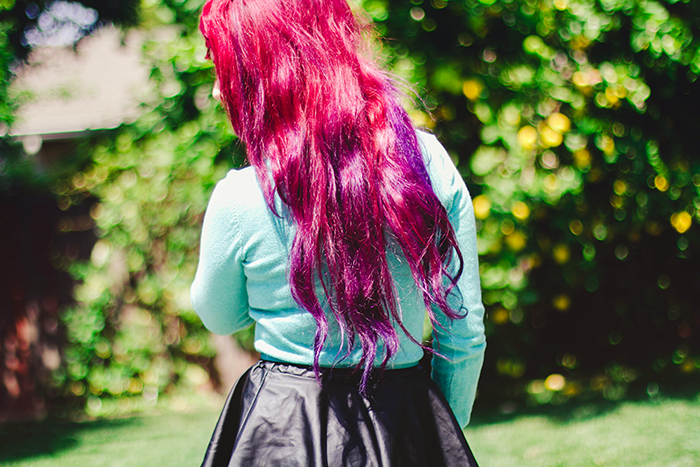
I have wanted a skirt like this for months but only at the right price. I thought I could probably find one for under ten bucks.... AND IT HAPPENED!! Now I just need a fake leather jacket. Busty ladies can wear those, right? That's what is stopping me from getting one.
Happy Thursday ♥

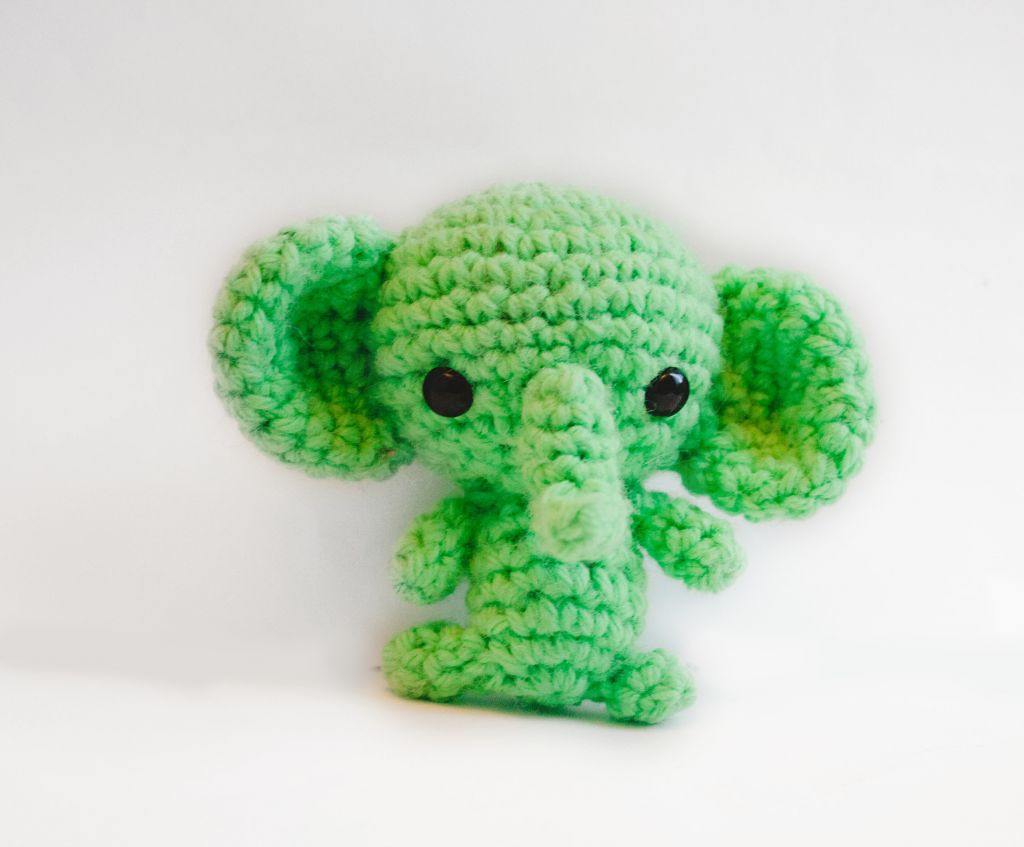
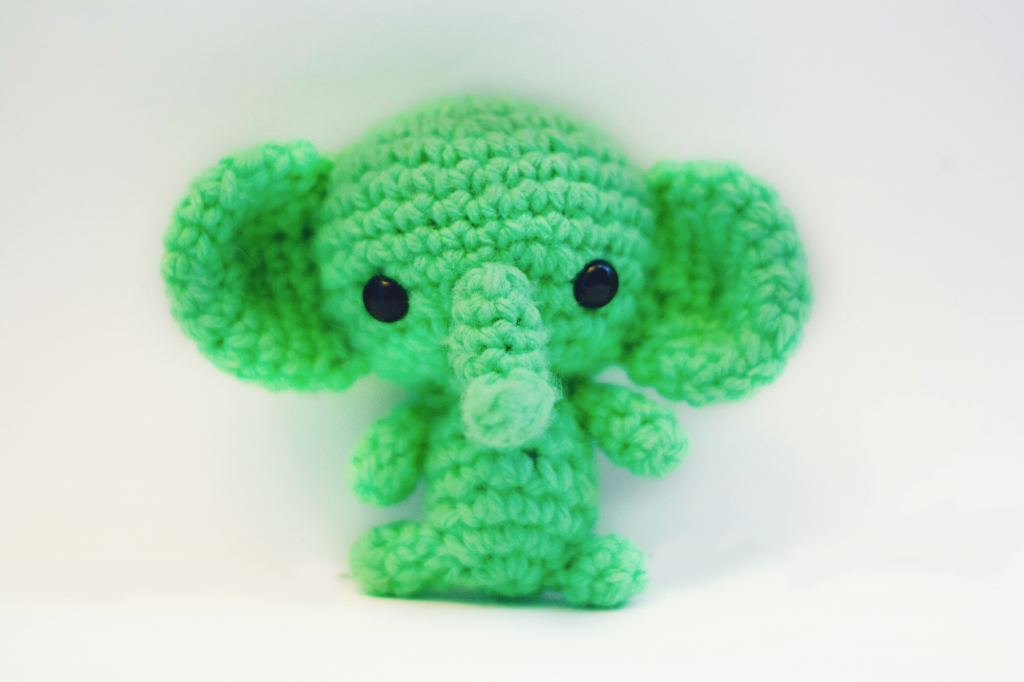
You will need white paper and natural light preferably near a window. :)
I placed paper down on my bed and stacked a couple of sheets against the wall then put the amigurumi in place. I took these photos around noon when the sun hits my window. I am using a 50mm lens at low f-stop and low ISO since it was bright. Bump up the ISO depending on your lighting condition.
If you have a continuous mode, use it!
Settings: f/2, 1/80, ISO 100
Editing

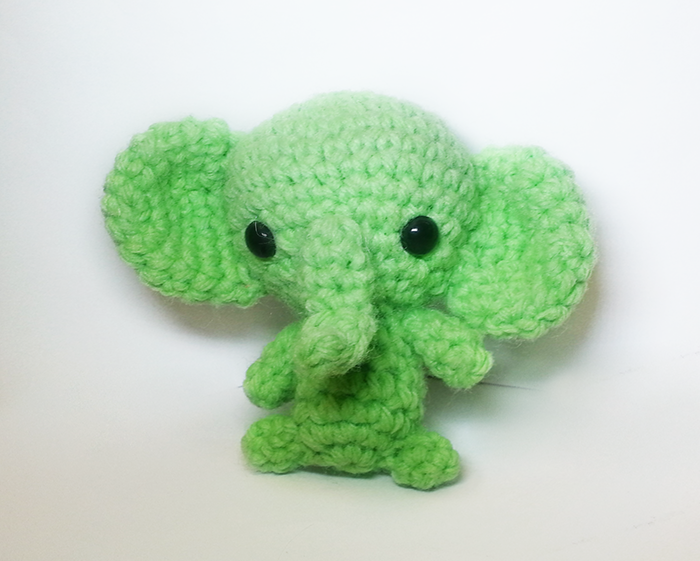
1) Crop out any distracting edges. If you have any lines you can select the brush tool & hold down CTRL to sample a color to paint over. That doesn't need to be perfect since we'll be brightening up the background next.

2) Merge down. Duplicate your layer. Go to Image> Adjustments> Brightness/Contrast and bump up the Brightness 50+. There we go! If your amigurumi is too bright, select a layer mask and use a black brush to paint it back.

3) If you feel that your amigurumi is too dark now, you can select a white brush and adjust the brush opacity settings to around 50%. Paint over your amigurumi to brighten it up.
OPTIONAL: Sharpening your image.

1) Go to Filter> Sharpen> Unsharp Mask and find the settings to fit your image.

Now it's complete! I save the high resolutions then afterwards resize at 700px as png's for posting on the web.
Before & After Comparison:

How to remove those random fuzzies or hair for close-ups:
1) Duplicate your layer. Select the healing brush tool at a small size. Select a nearby area by holding down CTRL and clicking.
2) Paint over it! Usually, this works. Sometimes you'll need to use the clone stamp tool.


That's it!
You don't need a super expensive camera to do this. ♥ Just white space and good lighting.
Settings: f/5, 1/40, ISO 400
Settings: f/1.8, 1/200, ISO 400

Settings: f/2.6, 1/68, ISO 80
Happy Wednesday
4.17.2013
Style: Blue Galaxy
.png)
.png)
.png)
.png)
.png)
My newest addition to my slowly growing wig collection. It's shiny but it doesn't matter to me. I missed blue hair and this is so perfect! I'm in love with this color and how soft it is. I thought I couldn't get away with fooling people with this one but it had worked.
I never thought of using a foam board as a backdrop. Might be fun to do a couple of lookbook style shoots this way. These are test shoots. I'm surprised how bright these came out to be in such a dim room! I finally ordered a wireless remote the other day. Don't know what took me so long! I'm hoping it arrives this month.
Eevee decided to

Subscribe to:
Posts (Atom)


Social Icons